Friday, January 30, 2015

How to use chicken wire inside a fabric hoop.

Last week, I painted 2 hallways, 11 doors (10 white and 1 black), baseboards, and odds and ends. Yesterday, I desperately needed a craft day. A day that had nothing to do with paint! 

***
My friend Tuula loves the color pink. So much that she has an ongoing series of 
 Think Pink Mondays on her blog.
A while back I joined the Pink Ladies and made a pink dream catcher for my daughter. 
While I like pink, I don't love pink...

I decided to make one in the colors that I love. 
***
For this project you will need:
A hoop, chicken wire, strips of fabric, ribbon, twine, and embellishments.

First, cut a piece of chicken wire that will fit inside your hoop. Carefully bend it to fit and then cut the excess wire leaving just enough to bend over the hoop.

You can paint the hoop first... or not. I left this one natural wrapping around the entire hoop with ribbon and twine. This will cover the wires nicely.

Tie strips of fabric and ribbon around the bottom. Do this in whatever length you like. 
Add embellishments. 

If you don't particularly want a dream catcher... what about a message board or a custom wreath? Leave the fringe off of the bottom and you have a whole new project. 
It all starts with an idea. 

If you need some PINK ideas for the month of February, visit Tuula and see what the Pink Ladies have come up with.

I hope you were inspired!
Thank you so much for stopping by 
Thrift My House.

Friday, January 23, 2015

Hallway Reveal!

My hallway has been neglected for 20 years.
I just wasn't inspired... 

See the pretty buffet I decorated for Valentine's Day last year?
See the hallway just beyond it, yep, that's the hallway I'm talking about... pitiful.

One day, I was visiting Kelly's blog, The Essence of Home,
and she was explaining how to repurpose things. She had these beautiful armoire doors hanging on the wall and...I was inspired!
***
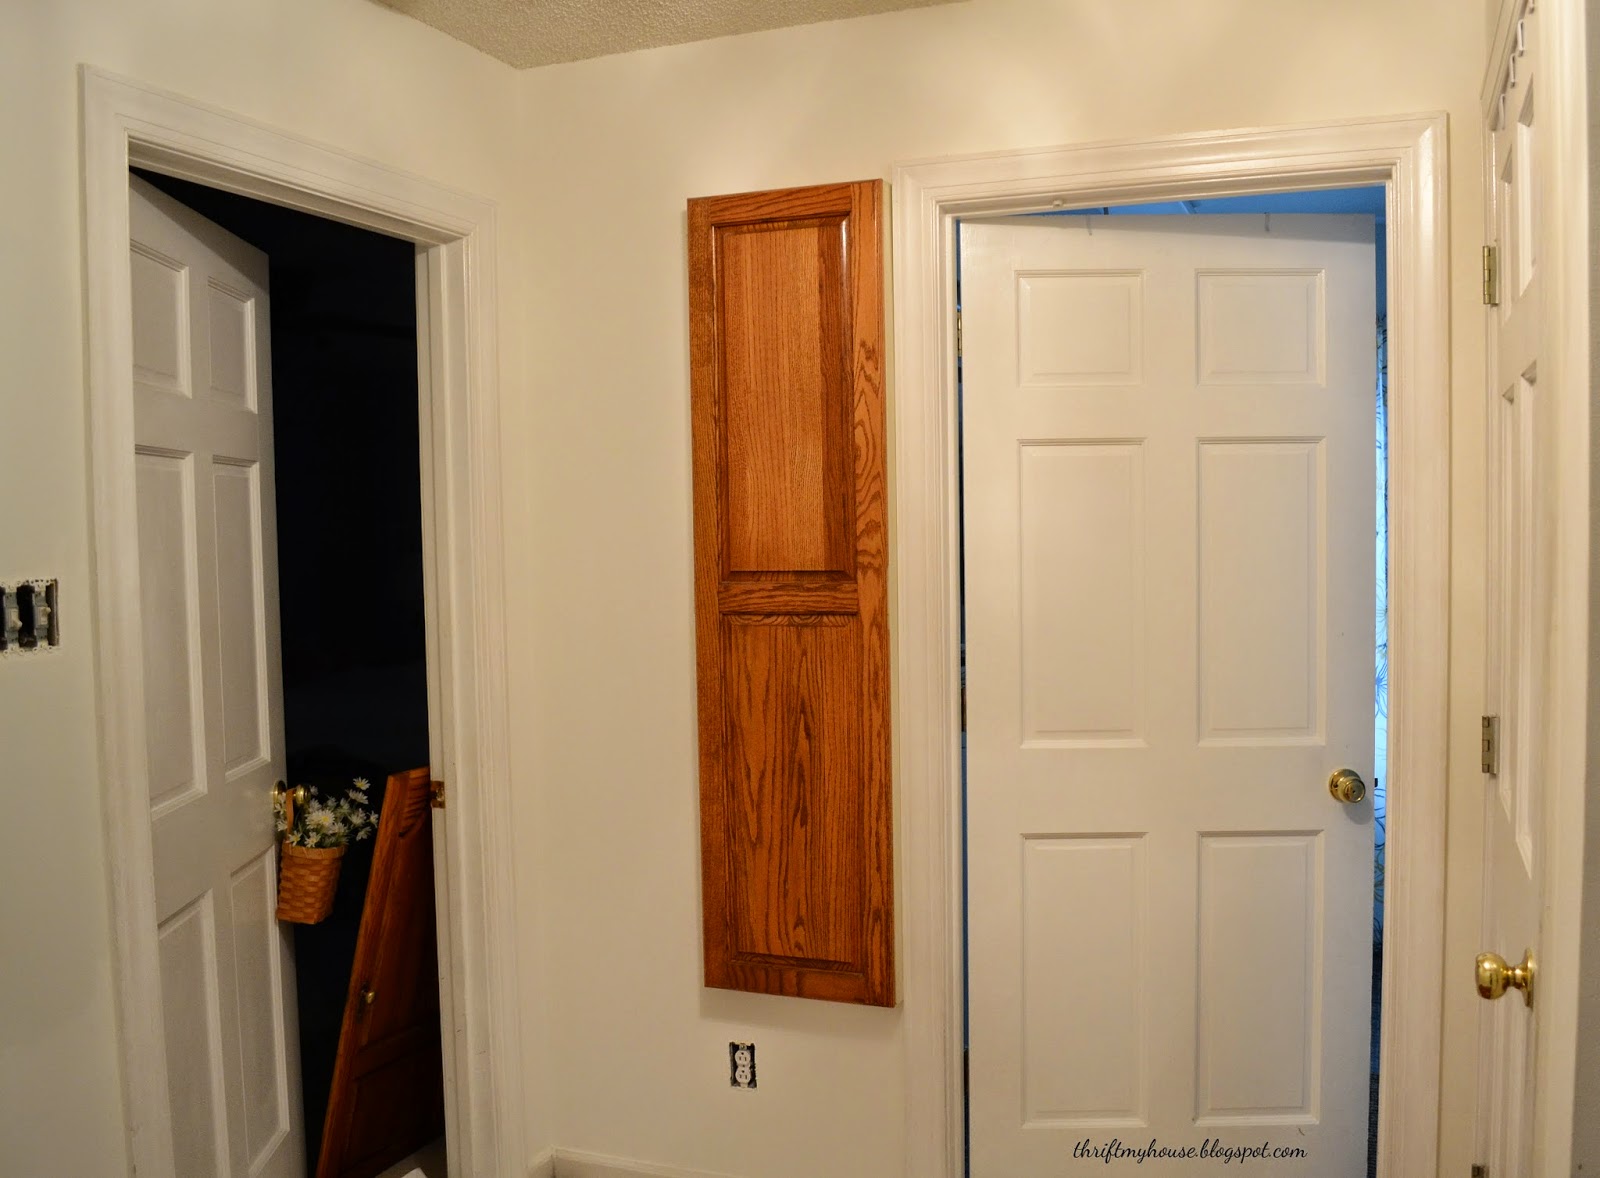
I had these doors in the attic. I took them off of my bedroom armoire a while back. I hung them on the hallway wall, added a storage bench, and a makeover was born. Suddenly, I knew exactly what I needed to do. It's amazing how inspiration happens!

Note.. there are 5 doors in this hallway. 
The one on the left is my oldest daughter's bedroom and the one on the right is the door that leads to the garage. I'm taking this picture from the doorway that leads to the dining room.

Circling around...
Beside the door leading to the garage is my bedroom. The laundry room and a hall closet are on the right. The orange rectangle is my ironing board. This really is a room full of doors.

First of all, I painted the walls, all 5 doors, the trim and the ironing board.
Big difference already...

I painted the door leading to the garage black. I was very nervous painting a door black... but I did it and I'm glad!
I painted the armoire doors, the bench, and made a couple of pillows. The white rag rug (machine washable) came from Ross.
(we don't wear shoes in the house so a white rug is fine)

Here's a another BEFORE.

And AFTER.

I can't believe it took me so long to update this space.
The basket on the bench is for "stuff" that accumulates on the bench. Being realistic here.

One last look. I can't stop looking at it :)
Let's just say, I'm so happy with this makeover.

Wall Color- Valspar Woodlawn Colonial Gray
White Paint- Olympic Delicate White
Black Paint- Olympic Black Magic
I hope you were inspired!
Thank you for stopping by
Thrift My House.

Tuesday, January 13, 2015

Lets talk shelves... along with Hometalk.

Shelves!

Remember this? 

You know, the time I took the doors off of my laundry room cabinets so that I could hang a pole and add various containers for storage? If you can't remember, you can see it here.

Well... the folks over at Hometalk asked me to curate a board of shelf ideas and share it with my readers. 


So I did. 

But first, I want to share a few shelving ideas I use in my home.

A while back, I took the doors off of my kitchen cabinets to help lighten up the kitchen. You can see it here.

Yes. I have a pallet rack hanging on the wall. Doesn't everyone?
I stapled chicken wire to the bottom of my "shelves" so that I'd have a flat surface for my pictures to sit on.

What about a shelf over the bed?
But of course you know the shelf isn't there anymore because I did a bedroom makeover. 
You can see it here.

I later moved the same shelf to the dining room above the buffet.
This is one of my favorite spots in my home to decorate.

I have this shelf above the TV in the bedroom.
I haven't yet quite figured out what to put on it.

Do you like dressing up your shelves?
We all know a shelf is more than just a shelf.

 This small shelf below my mirror in the living room is the perfect place to add a little something something.

Stacking shelves anyone?

Did you know that photo boxes fit perfectly on those shoe racks.
Here, I've stacked two shoe racks and transformed them into some crafty (and thrifty) storage shelves.

When I first started blogging, I added a shelf to the bottom of  this old chair. I used to have this sitting in my bathroom by the shower.

 I know this ironing board is more like a table, but it reminds me of a shelf because it's long and narrow.

 I hope you enjoyed a few of my shelf ideas. 
I say, if you have no idea what to put there... 
Put up a shelf.


For more shelf inspiration, visit my board at
I hope you were inspired!
Thank you so much for stopping by 
Thrift My House.

Monday, January 5, 2015

My 2015 Simple Winter Mantel


And how to make a pinwheel garland with phone book paper.
I've had this pinwheel garland for over 2 years and I still love it. 

To make this garland, you will need phone book paper, scotch tape, decorative fabrics or paper, buttons, and some twine.

First, you will make 3 folds, then you will fold the paper back and forth accordion style. Put scotch tape on the end to hold it. You will need to make 4 of them. I taped the 4 of them together on the back.
( I decided to make them where the ends of the pinwheels were plain, you'll have to play around with the paper to figure out the pattern you want your pinwheel to have.) 
 I added some simple embellishments.

    After all the Christmas reds and whites, I was ready for some neutral colors. Most of what I used here came from a thrift store.

The mantel seems much easier to decorate since I painted it white.

Have you been struggling with decorating after Christmas?
Keeping it simple worked for me.
I hope you were inspired!
Thank you for stopping by Thrift My House.
Linking with:
Roses of Inspiration