Tuesday, November 25, 2014

#12 - Picture Ornaments

12 Days of Homemade Ornaments.

Pictures...

These are special. My babies! Need I say more?

For this project you will need copies of your favorite photos, fabrics, glue, and embellishments.
 Cut your fabric into a photo mat. I used some cardboard a little smaller than my photograph as a template. Now glue the mat onto the front of the photo. You don't have to sew around it for this project, but I like how it looks.

Pull some fringe and add a hanger to the back.

Add embellishments.... 
 Memory Lane.
 Pictures!
***


I hope you were inspired! Thank you so much for stopping by
 Thrift My House.

Monday, November 24, 2014

#11 - Owl Ornaments

12 Days of Homemade Ornaments.
Owls...

I'm always amazed at what people come up with! I saw these cute owls over at Tator Tots and Jello

For this project you will need:
Wood Cut Outs
Bottle Caps and Plastic Eyes
Washi Tape
Glue Stick, Hot Glue
Scissors
Yellow Felt
Twine
Scrapbook Paper
Paint

First of all, I painted my wooden pieces. Some white, some gold.
Add washi tape to center.

Or on the sides... either way.

Make a little beak.

Glue the eyes inside the bottle caps and then glue the bottle caps to your owl's body.

Cut out little hearts and turn upside down for feet. Glue in place.

OWL MY GOSH! How cute are these!

Adorable!

These would OWLSO  make great gift tags as well as ornaments.
 Owls!
***
I hope you were inspired! Thank you so much for stopping by
 Thrift My House.

Friday, November 21, 2014

#10 - Yarn Ornaments

12 Days of Homemade Ornaments.

Yarn Wrapped Balls...

My Mom had foot surgery and had to stay put for a while. One day while I was visiting, she helped me make these ornaments. We had so much fun with this project. These ornaments will always be special to me.

For this project you will need: yarn, scissors, styrofoam balls, twine, glue gun, and spray adhesive (not shown).
(This picture is definitely upside down.)

Insert and hot glue a loop of yarn into the styrofoam ball.

I sprayed the ball with adhesive and carefully wrapped the yarn all around the ball. The adhesive helps to hold the yard in place so you can get started and keep wrapping it until it's nice and full. I warn you, this is not as easy as it sounds. You have to keep the yarn wrapped tightly around the ball and evenly spaced.

Even though this project was challenging,
I LOVE these! In a bowl, on the table....
or hanging in a row.
Yarn Wrapped Balls!
***


I hope you were inspired! Thank you so much for stopping by
 Thrift My House.

Thursday, November 20, 2014

#9 - Clear Glass Ball Ornaments

12 Days of Homemade Ornaments

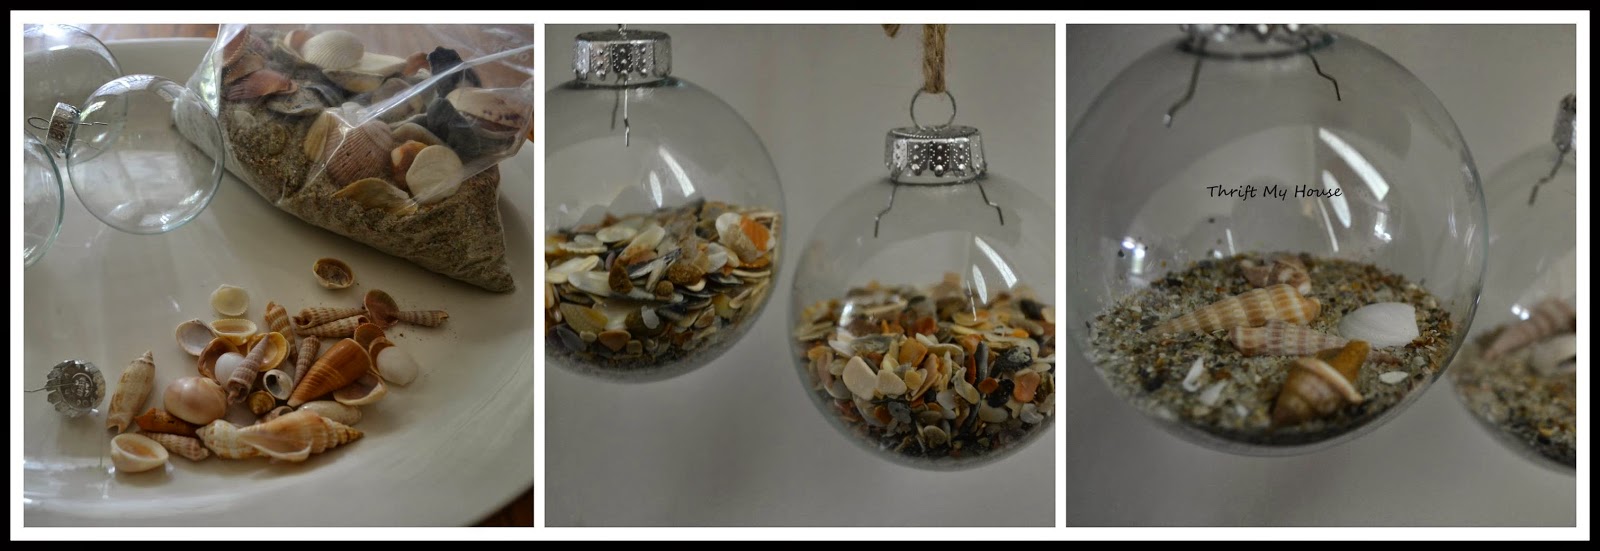
Clear Glass Ball Ornaments...

Do you decorate with memories of summer? These are so beautiful. I hope you will be inspired to make a few  and share them with family and friends. 

For this project, you will need clear glass ball ornaments. I picked these up cheap at a thrift store.

Next, fill them with things that you love. 
Dried Hydrangeas.

Dried Flower Petals.

Feathers.

Cotton Bolls.

Beach Treasures.

Peacock Feathers.

Capturing Memories.

Oh So Pretty!
Clear Glass Ball Ornaments...
***
I hope you were inspired! Thank you so much for stopping by
 Thrift My House.


Wednesday, November 19, 2014

#8 - Old Board Ornaments

12 Days of Homemade Ornaments

Old Board Ornaments...

 I made these ornaments during the summer of 2013. I didn't have much Christmas stash left to choose from. BUT, I love the challenge of making something when you have next to nothing....

 For this project you will need: Old boards, fabrics and embellishments. Anything you can find really.

 And see what YOU can come up with. I made these literally scraping the bottom of my craft barrel.


 Old Board Ornaments!


I hope you were inspired! Thank you so much for stopping by
 Thrift My House.

Tuesday, November 18, 2014

#7 - Mod Podge Ornaments

12 Days of Homemade Ornaments.

Mod Podge Christmas Ornaments...

I really like these! I'd love to make a bunch of map paper ones just to keep in a bowl all year long.

For this project, gather together some Styrofoam balls.

I inserted a wire stick into each ball so that I would have something to hold on to while I glued the paper to the ball.

I cut strips of scrapbook paper and then made tons of little squares.

I poured Elmer's glue into a bowl and thinned it a little with some water.  Then I dipped the paper in the glue and started covering the ball. This went pretty fast.

I sat them out on the back porch in the sun so they would dry faster.

I brought them inside and hot glued some twine for a hanger. And then I painted them with gloss mod podge to give them a little shine. I let them dry overnight.

These look really pretty and I'm so happy how they turned out.

 Ball+Paper+Glue=Pretty!
 Mod Podge Christmas Ornaments!


I hope you were inspired! Thank you so much for stopping by
 Thrift My House.


Monday, November 17, 2014

#6 - Bell Ornaments

12 Days of Homemade Ornaments
Bells...

These were my least favorite ornaments. BUT, after hanging them on the tree last year, they became one of my favorites. It's amazing what a difference a tree makes!


 I found these bells at Salvation Army. 

Honestly, I had no idea what to do with them.

When you don't know what to do... just paint it. 
That's my motto.

And you can always number them...

 And glitter never hurts...

Well... Well... Well...
Bells!
***
I hope you were inspired! Thank you so much for stopping by
 Thrift My House.